
Choosing the Right Hardware Platform: MCU vs SBC vs AI Edge for IoT Projects
The Cost of Choosing the Wrong Platform One of the most common reasons for hardware project failure is selecting the
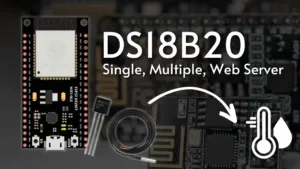
The ESP32 is a powerful, Wi-Fi and Bluetooth-enabled microcontroller that’s perfect for Internet of Things (IoT) projects. One of the most common applications is environmental monitoring, and accurately measuring temperature is a fundamental part of that. The DS18B20 temperature sensor is a popular choice for this task due to its durability, digital output, and simple wiring.
This tutorial will guide you through the complete process of connecting a DS18B20 sensor to an ESP32 board and reading temperature data using the Arduino IDE. By the end, you’ll have a functional circuit and the code to start your own smart thermostat, weather station, or any other temperature-logging project.
ESP32 Development Board: (e.g., ESP32 Dev Module, NodeMCU-32S).
DS18B20 Temperature Sensor: Waterproof models are also available for outdoor use.
4.7kΩ Resistor: Essential for the communication protocol (pull-up resistor).
Breadboard and Jumper Wires: For prototyping the circuit.
Micro-USB Cable: To power and program the ESP32.
Understanding the DS18B20 Sensor and Its Wiring
The DS18B20 is a digital sensor that communicates over a 1-Wire protocol, which means it only requires one data line (plus power and ground) to communicate with the microcontroller.
GND (Black Wire): Ground.
VDD (Red Wire): Power supply (3.3V to 5V). Our ESP32 will provide 3.3V.
DQ (Yellow Wire): Data line (requires a pull-up resistor).
| DS18B20 Pin | ESP32 GPIO Pin | Wire Color |
|---|---|---|
| GND | GND | Black |
| VDD | 3.3V | Red |
| DQ | GPIO 4 | Yellow |
| 4.7kΩ Resistor | Between VDD and DQ | – |
Connect the DS18B20 VDD pin to the ESP32 3.3V pin.
Connect the DS18B20 GND pin to any ESP32 GND pin.
Connect the DS18B20 DQ pin to ESP32 GPIO 4 (this is a common choice, but other digital pins will work).
Connect the 4.7kΩ resistor between the VDD and DQ lines on the breadboard. This “pull-up” resistor is critical for stable data communication.
Install ESP32 Board Support: If you haven’t already, you need to add ESP32 support to the Arduino IDE. Go to File > Preferences and enter https://raw.githubusercontent.com/espressif/arduino-esp32/gh-pages/package_esp32_index.json in the “Additional Boards Manager URLs” field. Then, go to Tools > Board > Boards Manager,search for “ESP32“, and install it.
Install Required Libraries: You will need two libraries:
OneWire: Helps manage the 1-Wire protocol.
DallasTemperature: Simplifies reading temperature values from DS18B20 and similar sensors.
Go to Sketch > Include Library > Manage Libraries..., search for and install both “OneWire” by Jim Studt and “DallasTemperature” by Miles Burton.
Copy and upload the following code to your ESP32. Remember to select your specific ESP32 board and the correct COM port under the Tools menu.
#include <OneWire.h>
#include <DallasTemperature.h>
// GPIO where the DS18B20 data line is connected
#define ONE_WIRE_BUS 4
// Setup a oneWire instance to communicate with any OneWire device
OneWire oneWire(ONE_WIRE_BUS);
// Pass our oneWire reference to DallasTemperature library
DallasTemperature sensors(&oneWire);
void setup(void) {
// Start serial communication for debugging
Serial.begin(115200);
// Initialize the temperature sensor library
sensors.begin();
Serial.println(“ESP32 DS18B20 Temperature Reading”);
}
void loop(void) {
// Send the command to get temperatures
sensors.requestTemperatures();
// Read and print temperature in Celsius
Serial.print(“Temperature: “);
Serial.print(sensors.getTempCByIndex(0));
Serial.println(” °C”);
// To read in Fahrenheit, uncomment the following lines
// Serial.print(sensors.getTempFByIndex(0));
// Serial.println(” °F”);
delay(5000); // Wait 5 seconds between readings
}
Libraries: The code includes the necessary libraries for handling the sensor.
GPIO Definition: #define ONE_WIRE_BUS 4 sets the data pin to GPIO 4.
Object Setup: It creates objects for the OneWire and DallasTemperature protocols.
setup():
Initializes the serial monitor at a baud rate of 115200.
Calls sensors.begin() to start communication with the sensor.
loop():
sensors.requestTemperatures() sends a request for a temperature reading.
sensors.getTempCByIndex(0) fetches the temperature in Celsius from the first device found on the bus. The index (0) is used if you have only one sensor.
After uploading the code, open the Serial Monitor (Tools > Serial Monitor) and set the baud rate to 115200. You should see a new temperature reading in degrees Celsius printed to the screen every 5 seconds. Try warming the sensor with your finger to see the value change.
Troubleshooting Common Issues
-127 °C or 85 °C: This usually indicates a wiring problem. Double-check all connections, especially the 4.7kΩ pull-up resistor between VDD and DQ.
No Data in Serial Monitor: Ensure the correct COM port is selected and the baud rate is set to 115200.
Sensor Not Found: Verify the GPIO pin in the code matches the physical pin you used.
You have now successfully read temperature data using an ESP32 and a DS18B20 sensor. This setup is the foundation for countless IoT projects. Here are some ideas to expand on this:
Smart Thermostat: Control a HVAC system based on room temperature.
Remote Weather Station: Use the ESP32‘s Wi-Fi to send temperature data to the cloud (e.g., ThingSpeak, Blynk, or your own server).
Aquarium Temperature Monitor: Use a waterproof DS18B20 to log water temperature and get alerts if it gets too hot or cold.
The digital and resilient nature of the DS18B20 makes it an excellent choice for both beginners and advanced developers building environmental monitoring systems.
======================================
No account yet?
Create an Account