
The Ultimate Guide to ESP32 E-Paper Power Consumption (How to Achieve 1+ Year Battery Life)
If you read the marketing materials for e-paper displays, you’ll see a recurring promise: “Ultra-low power consumption, ideal for battery-operated
If you’re working with the ESP32, you’ve likely faced the challenge of managing web server assets, configuration files, or data logs. Manually embedding this data into your code is cumbersome and inflexible. The solution is the ESP32 Filesystem Uploader, a vital tool for any developer looking to efficiently manage the ESP32‘s onboard flash memory directly from the Arduino IDE.
This comprehensive guide provides clear, step-by-step instructions for installing the uploader plugin on Windows, macOS, and Linux, demonstrates its practical use, and offers expert troubleshooting advice to save you time and frustration. By the end, you’ll be able to seamlessly upload HTML, CSS, JSON, and text files to your ESP32, unlocking advanced project possibilities.
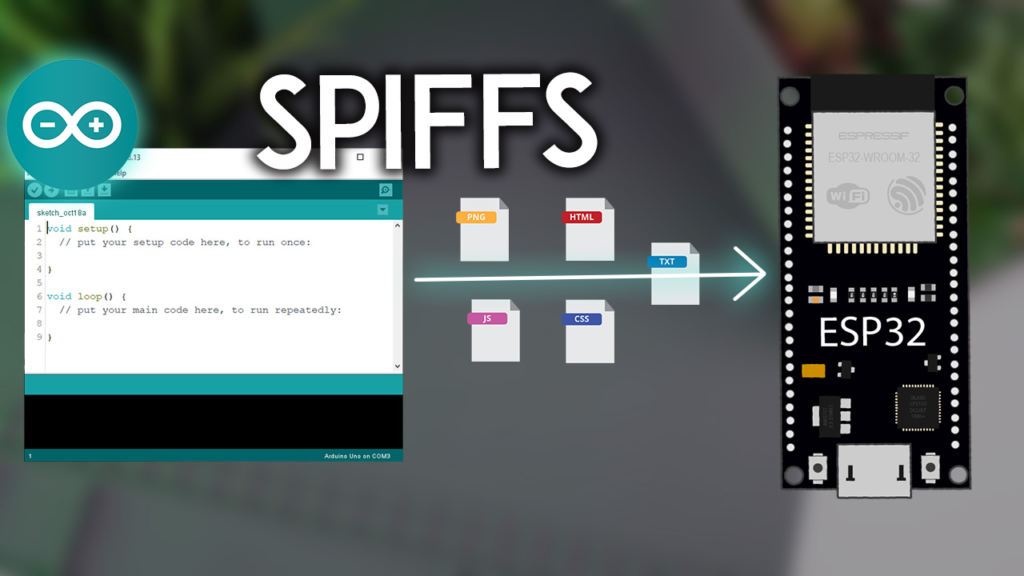
The ESP32‘s flash memory can be managed using a filesystem, similar to an SD card but integrated directly onto the chip. The Serial Peripheral Interface Flash File System (SPIFFS) was the original lightweight system designed for this purpose. It allows you to create, read, write, and delete files, making it perfect for:
Storing HTML, CSS, and JavaScript for web servers.
Saving device configuration and settings in files (e.g., JSON, .txt).
Logging data without the need for an external SD card module.
Holding small images, icons, or fonts for displays.
Important Update for 2026: While SPIFFS is still functional, the Espressif development team has deprecated it in favor of LittleFS. LittleFS offers better reliability, faster read/write operations in certain scenarios, and official support in newer frameworks like Arduino IDE 2.0. For new projects, especially with Arduino IDE 2.0, it is highly recommended to use the ESP32 LittleFS Uploader. You can follow a dedicated guide for Installing the LittleFS Uploader in Arduino IDE 2.0.
This tutorial focuses on the SPIFFS uploader, which remains widely used in existing projects and is fully compatible with the legacy Arduino IDE (1.8.x).
Before you begin, ensure you have the ESP32 board package installed in your Arduino IDE. If not, you can install it via Tools > Board > Boards Manager... and search for “ESP32”.
The uploader is installed as a plugin within your Arduino sketchbook folder. Here’s how to do it for each operating system:
1. Download the Plugin:
Visit the ESP32FS Plugin GitHub releases page and download the ESP32FS-1.0.zip file.
2. Locate Your Arduino Sketchbook Folder:
Open Arduino IDE, go to File > Preferences. The “Sketchbook location” path is displayed here. (e.g., C:\Users\[YourName]\Documents\Arduino on Windows, /Users/[YourName]/Documents/Arduino on macOS, or /home/[YourName]/Arduino on Linux).
3. Install the Plugin:
Follow the instructions specific to your OS in the table below.
| Operating System | Actions to Perform Inside Your Sketchbook Folder |
|---|---|
| Windows | 1. Create a new folder named tools (if it doesn’t exist).2. Unzip the downloaded ESP32FS-1.0.zip.3. Copy the extracted ESP32FS folder into the tools folder. |
| macOS / Linux | 1. Create a new folder named tools (if it doesn’t exist).2. Unzip the downloaded file in your terminal or using Archive Utility. 3. Move the extracted ESP32FS folder into the tools folder. |
4. Verify Installation:
Restart the Arduino IDE completely. Open any sketch, select your ESP32 board under Tools > Board, and look for the new menu option: Tools > ESP32 Sketch Data Upload. If you see it, the installation was successful.
With the plugin installed, uploading files is straightforward. The plugin uploads all files from a specific data folder within your project sketch folder.
Create or Open a Sketch: Start a new project or open an existing one in the Arduino IDE.
Create the Data Folder: Go to Sketch > Show Sketch Folder. In the window that opens, create a new folder named data.
Add Your Files: Place all files you want on the ESP32 into this data folder. You can add .txt, .html, .css, .js, .json, or even image files.
Upload to Filesystem: Ensure your ESP32 is connected via USB. In the Arduino IDE, simply go to Tools > ESP32 Sketch Data Upload.
The console will show progress and end with “SPIFFS Image Uploaded.”
Pro Tip: On some development boards (like ESP32 DevKit), you may need to press the BOOT button when you see the “Connecting…” message in the console to initiate the upload.
Warning: This upload process overwrites the entire SPIFFS partition. Any files previously stored on the board will be erased and replaced with the contents of your local
datafolder.
To verify your files were uploaded correctly, upload the following test sketch to your ESP32. This sketch mounts the SPIFFS filesystem and reads the contents of a file named test_example.txt.
#include "SPIFFS.h" // Include the SPIFFS library

void setup() {
  Serial.begin(115200);

  // Initialize SPIFFS
  if(!SPIFFS.begin(true)){
    Serial.println("An Error has occurred while mounting SPIFFS");
    return;
  }

  // Open the file for reading
  File file = SPIFFS.open("/test_example.txt", "r");
  if(!file){
    Serial.println("Failed to open file for reading");
    return;
  }

  // Read and print the file content to the Serial Monitor
  Serial.println("=== File Content ===");
  while(file.available()){
    Serial.write(file.read());
  }
  Serial.println("\n=== End of File ===");
  file.close();
}

void loop() {
  // Empty
}
After uploading the code, open the Serial Monitor (Tools > Serial Monitor) at a baud rate of 115200. Press the ENABLE/RST button on your ESP32. You should see the contents of your test_example.txt file printed on the screen.
Even with careful setup, you might encounter issues. Here are solutions to the most common problems, curated from real user experiences:
“ESP32 Sketch Data Upload” menu is missing: This almost always means the plugin is in the wrong location. Double-check that the folder structure exactly matches: <Sketchbook>/tools/ESP32FS/tool/esp32fs.jar. Restart the IDE after correcting the path.
“Failed to open file for reading” or file appears empty: This has multiple potential causes:
File Not Uploaded: Ensure you successfully ran “ESP32 Sketch Data Upload” after placing files in the data folder. Code upload and filesystem upload are separate processes.
File Path or Name Mismatch: The path in your code must exactly match the filename in SPIFFS, including the leading slash (e.g., "/index.html"). Be mindful of file extensions.
SPIFFS Not Initialized: Ensure SPIFFS.begin() returns true. The example code uses SPIFFS.begin(true), which formats the partition if mounting fails, useful for first-time setup.
Upload Error: “esptool not found!” or Port Access Denied: This usually indicates a conflict with the serial port.
Close Serial Monitor: Ensure the Serial Monitor or any other terminal software (like PlatformIO Serial) is closed before starting the filesystem upload.
Check Driver: On Windows, verify you have the correct USB-to-UART driver (like CP210x or CH340) installed.
Code compiles but SPIFFS functions don’t work (Mac/Linux): A common oversight on Unix-based systems is that creating a file named test.txt might not automatically add the .txt extension. Use the ls -la command in the terminal or ensure “Show all filename extensions” is enabled in your file manager to check the true filename.
Now that you have mastered file management on the ESP32, you can explore more advanced projects:
Build a Web Server: Create a robust web interface by serving HTML, CSS, and JavaScript files directly from SPIFFS. This is far more efficient than storing HTML as strings in your code. Check out the tutorial for building an ESP32 Web Server using SPIFFS.
Save Sensor Data: Log data from sensors to a .csv or .txt file on the filesystem for later retrieval or analysis.
Device Configuration: Store Wi-Fi credentials (ssid, password) or API keys in a configuration file (e.g., config.json), allowing you to update settings without reprogramming the entire sketch.
For saving structured data like settings, also consider the ESP32 Preferences library, which is excellent for storing key-value pairs in non-volatile storage (NVS). You can learn more in the guide to the ESP32 Preferences Library.
Mastering the ESP32 filesystem is a fundamental skill that transitions your projects from simple prototypes to professional, maintainable applications. By leveraging this guide, you are now equipped to handle file storage efficiently, paving the way for more complex and powerful IoT developments.
======================================
No account yet?
Create an Account